Midwinter AdviceOS

Moneysoft CRM, Fact Find and Data Feed Integration Process – Midwinter AdviceOS CRM and Moneysoft PFM Data

Summary

When integrated, Moneysoft and AdviceOS deliver a powerful combination. The following guide runs through the set-up process in five short, easy to follow steps.

Ensure your AdviceOS version has the CRM and Fact Find module activated as this is where the data is integrated to. All AdviceOS sites will have the System Settings page as described enabled.

Note: You must ensure that the Moneysoft CRM Fact Find integration is enabled. If you are unsure please verify with your AdviceOS site administrator and confirm they have activated the Moneysoft CRM Fact Find integration.

If you have any questions or need any help with your own set-up, please email us at support@moneysoft.com.au or call us on 1300 850 878.

For a printable version of this process please click here.

Steps 

1.  Confirm you have an operational Moneysoft Professional or Partner account with active clients

  • If you do not have an active account, register here and invite your clients.

2.  Confirm the Moneysoft CRM Fact Find Integration is Active

  • Confirm that the Moneysoft CRM Fact Find integration is available within your site. If you are an administrator of your AdviceOS site and are unsure, read below to learn how to complete the activation.

3.  Contact Midwinter

  • Contact Midwinter support on 1300 882 938 or info@midwinter.com.au and request the provision of a secret key required to connect the integration. 
  • The Midwinter support team is available Monday to Friday from 8:30 am – 6:00 pm AEST to assist with the use or operation of AdviceOS. 
  • Once you have been provided with the secret key please proceed to the next step.

4.  Authenticate the Moneysoft and AdviceOS Site Connection

  • Log into your Moneysoft Professional or Partner account to activate your AdviceOS synchronisation and sync your clients. 
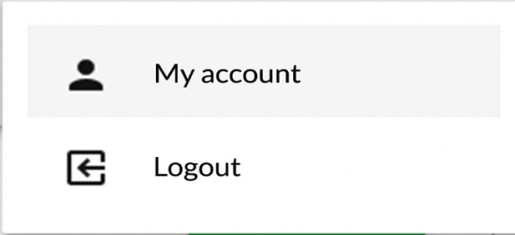
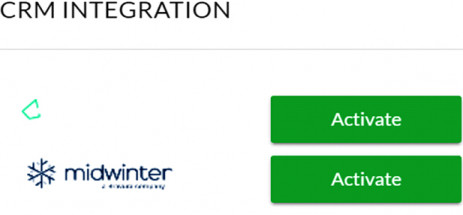
  • Once logged in, navigate to your My Account page, scroll down to the CRM Integration module and click the Activate button beside the Midwinter AdviceOS logo.
 img 1

img 2

  • Enter your AdviceOS site URL (forward host), Username and Password “secret”, which is provided by the Midwinter support team (refer to step 3 above) in the respective fields then click Save & Test.
    • Make sure you enter the https:// section of your AdviceOS site URL into the Forward host field.
 img 3
  • A credentials verified message will be displayed if the log in is successful.

image4

5.  Enable the user data flow and Import clients

  • You can toggle whether you would like data to just be imported and not exported. 
    • Imported means from Midwinter AdviceOS to Moneysoft and vice-versa for export. 
  • Click Import Clients to retrieve your clients
  • A confirmation message is displayed detailing the number of clients retrieved. 
    • Note: This step will need to be performed each time you have a new client in AdviceOS which is not yet listed in your Moneysoft clients list.
  • You can now link and match clients in Moneysoft to clients in AdviceOS.
image5

6.  Link Clients Between Moneysoft and AdviceOS

  • There are two ways clients can linked between Moneysoft and AdviceOS
    • Link a new client from the invitation menu where client data exists in AdviceOS but not in Moneysoft
      – See Step 6
    • Link an existing client from the client menu where client data exists in AdviceOS and in Moneysoft – See Step 7

7.  Link a New Client from the Invitation Menu where Client Data Exists in AdviceOS but not in Moneysoft

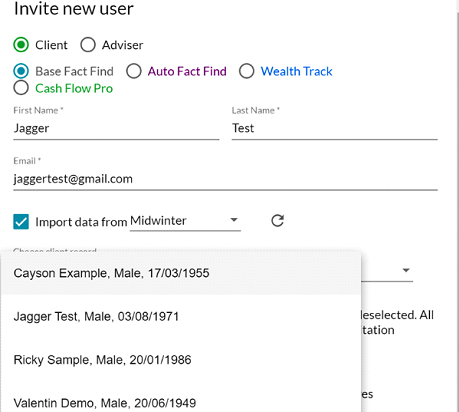
Once you have retrieved the AdviceOS client list, from the client invitation module in Moneysoft you can Import client data at the time of inviting the related client.

  • Enter the client name and email address.
  • Check Import data and select from AdviceOS.
 img 6
  • From the Choose AdviceOS Record drop down list, select the client whose AdviceOS data is to be linked.
 img 7

 img 8.jpg

  • Once a client is linked the AdviceOS integration icon will be displayed against the client on the Individual Clients page as shown below.
    • Hovering over the AdviceOS integration icon which will display Linked to AdviceOS
    • A client not linked to AdviceOS will have no integration icon
  • Client data available in AdviceOS will be retrieved and pre-populated into the client Profile section in Moneysoft, i.e. relevant data points within the client’s Fact Find modules will be updated when the client logs in.
img 9

8.  Linking an Existing Client from the Client Menu where Client Data Exists in AdviceOS and in Moneysoft

This option is used where the client already exists in Moneysoft and in AdviceOS to link or sync the client between the both systems, i.e. the client already has an active account in Moneysoft.

  • Click on the three dot / three dash options menu for the selected client and select Sync with AdviceOS to open the Sync Update pop up window
 img 10
  • In the Sync Update pop up window select the AdviceOS client to map to the Moneysoft client from the Mapped to AdviceOS Client drop down list.
 img 11
  • Once the client is selected a list of data will appear with the respective fields. Click refresh to display any other fields that may have new data. 
 img 12
  • Defining the Sync Update terminology:
    • Item – The respective data fields, e.g. name, date of birth, contact numbers and all the fields that are available to sync between the two systems will be listed
    • Moneysoft Value – This is data that has been entered into Moneysoft or available in Moneysoft
    • External Value “Advice OS” – This is the data that is available in AdviceOS or that has been entered in AdviceOS 
    • Sync – The direction of the sync data. The arrows depict the direction the data is to be synced, i.e. down arrow mean from Moneysoft to AdviceOS and up arrow means from AdviceOS to Moneysoft
    • If you do not want to Sync the information select the ‘X’. This will leave the information as is in both systems. 
    • In Sync – A ✔ icon indicates the data is in sync between the two systems, i.e. the data matches. An x indicates the data is not in sync between the two systems, i.e. the data does not match. 
  • For any data points marked with an x, select the direction of sync then click Proceed to sync the data in the direction selected.

9.  New Data Syncing

  • When there is new data in either system that is not in sync, the integrator logo will be highlighted for the relevant client.
  • To sync the data, click on the Out of Sync icon
 img 13
  • In the Sync Update pop up window, a list of new data points will be listed that can be synced between Moneysoft and AdviceOS.
 img 14

Fields and API Data Points

Below is a list of data items and fields which from part of the integration and sync to and from AdviceOS as part of the Midwinter integration. As more fields and API data points are made available by AdviceOS, Moneysoft will continue to develop and enhance the mappings and integration.

Item

Create

Read

Update

Delete

client

Yes

Yes

Yes

No

client group

Yes

Yes

Yes

No

contact

Yes

Yes

Yes

No

address

Yes

Yes

Yes

No

dependent

Yes

Yes

Yes

No

expense

Yes

Yes

Yes

No

estate planning

N/A

N/A

N/A

N/A

goal

N/A

N/A

N/A

N/A

income

Yes

Yes

Yes

No

insurance

Yes

Yes

Yes

Yes

liability

Yes

Yes

Yes

Yes

objective

Yes

Yes

Yes

Yes

portfolio

Yes

Yes

Yes

No

retirement income

N/A

N/A

N/A

N/A

superannuation

N/A

N/A

N/A

N/A